Chart Examples
For designed, step-by-step teaching examples, open the five interactive chart lessons. The screenshots below show the indicator on MT5; the interactive lessons use illustrative data.
Chart walkthroughs for the Confluence Indicator Suite on MetaTrader 5. Use these after Confluence reads and Confluence status model to see how Setup, Wave, Banana, and Bubble facts combine into one dashboard verdict.
Screenshots show setups to review. They are not trade recommendations. VALID on the Banana tab and AVOID on Banana Confluence can coexist — confluence filters context, not just the last arrow.
Chart: BTCUSD · Timeframe: M5 or M1 (as labeled per example)
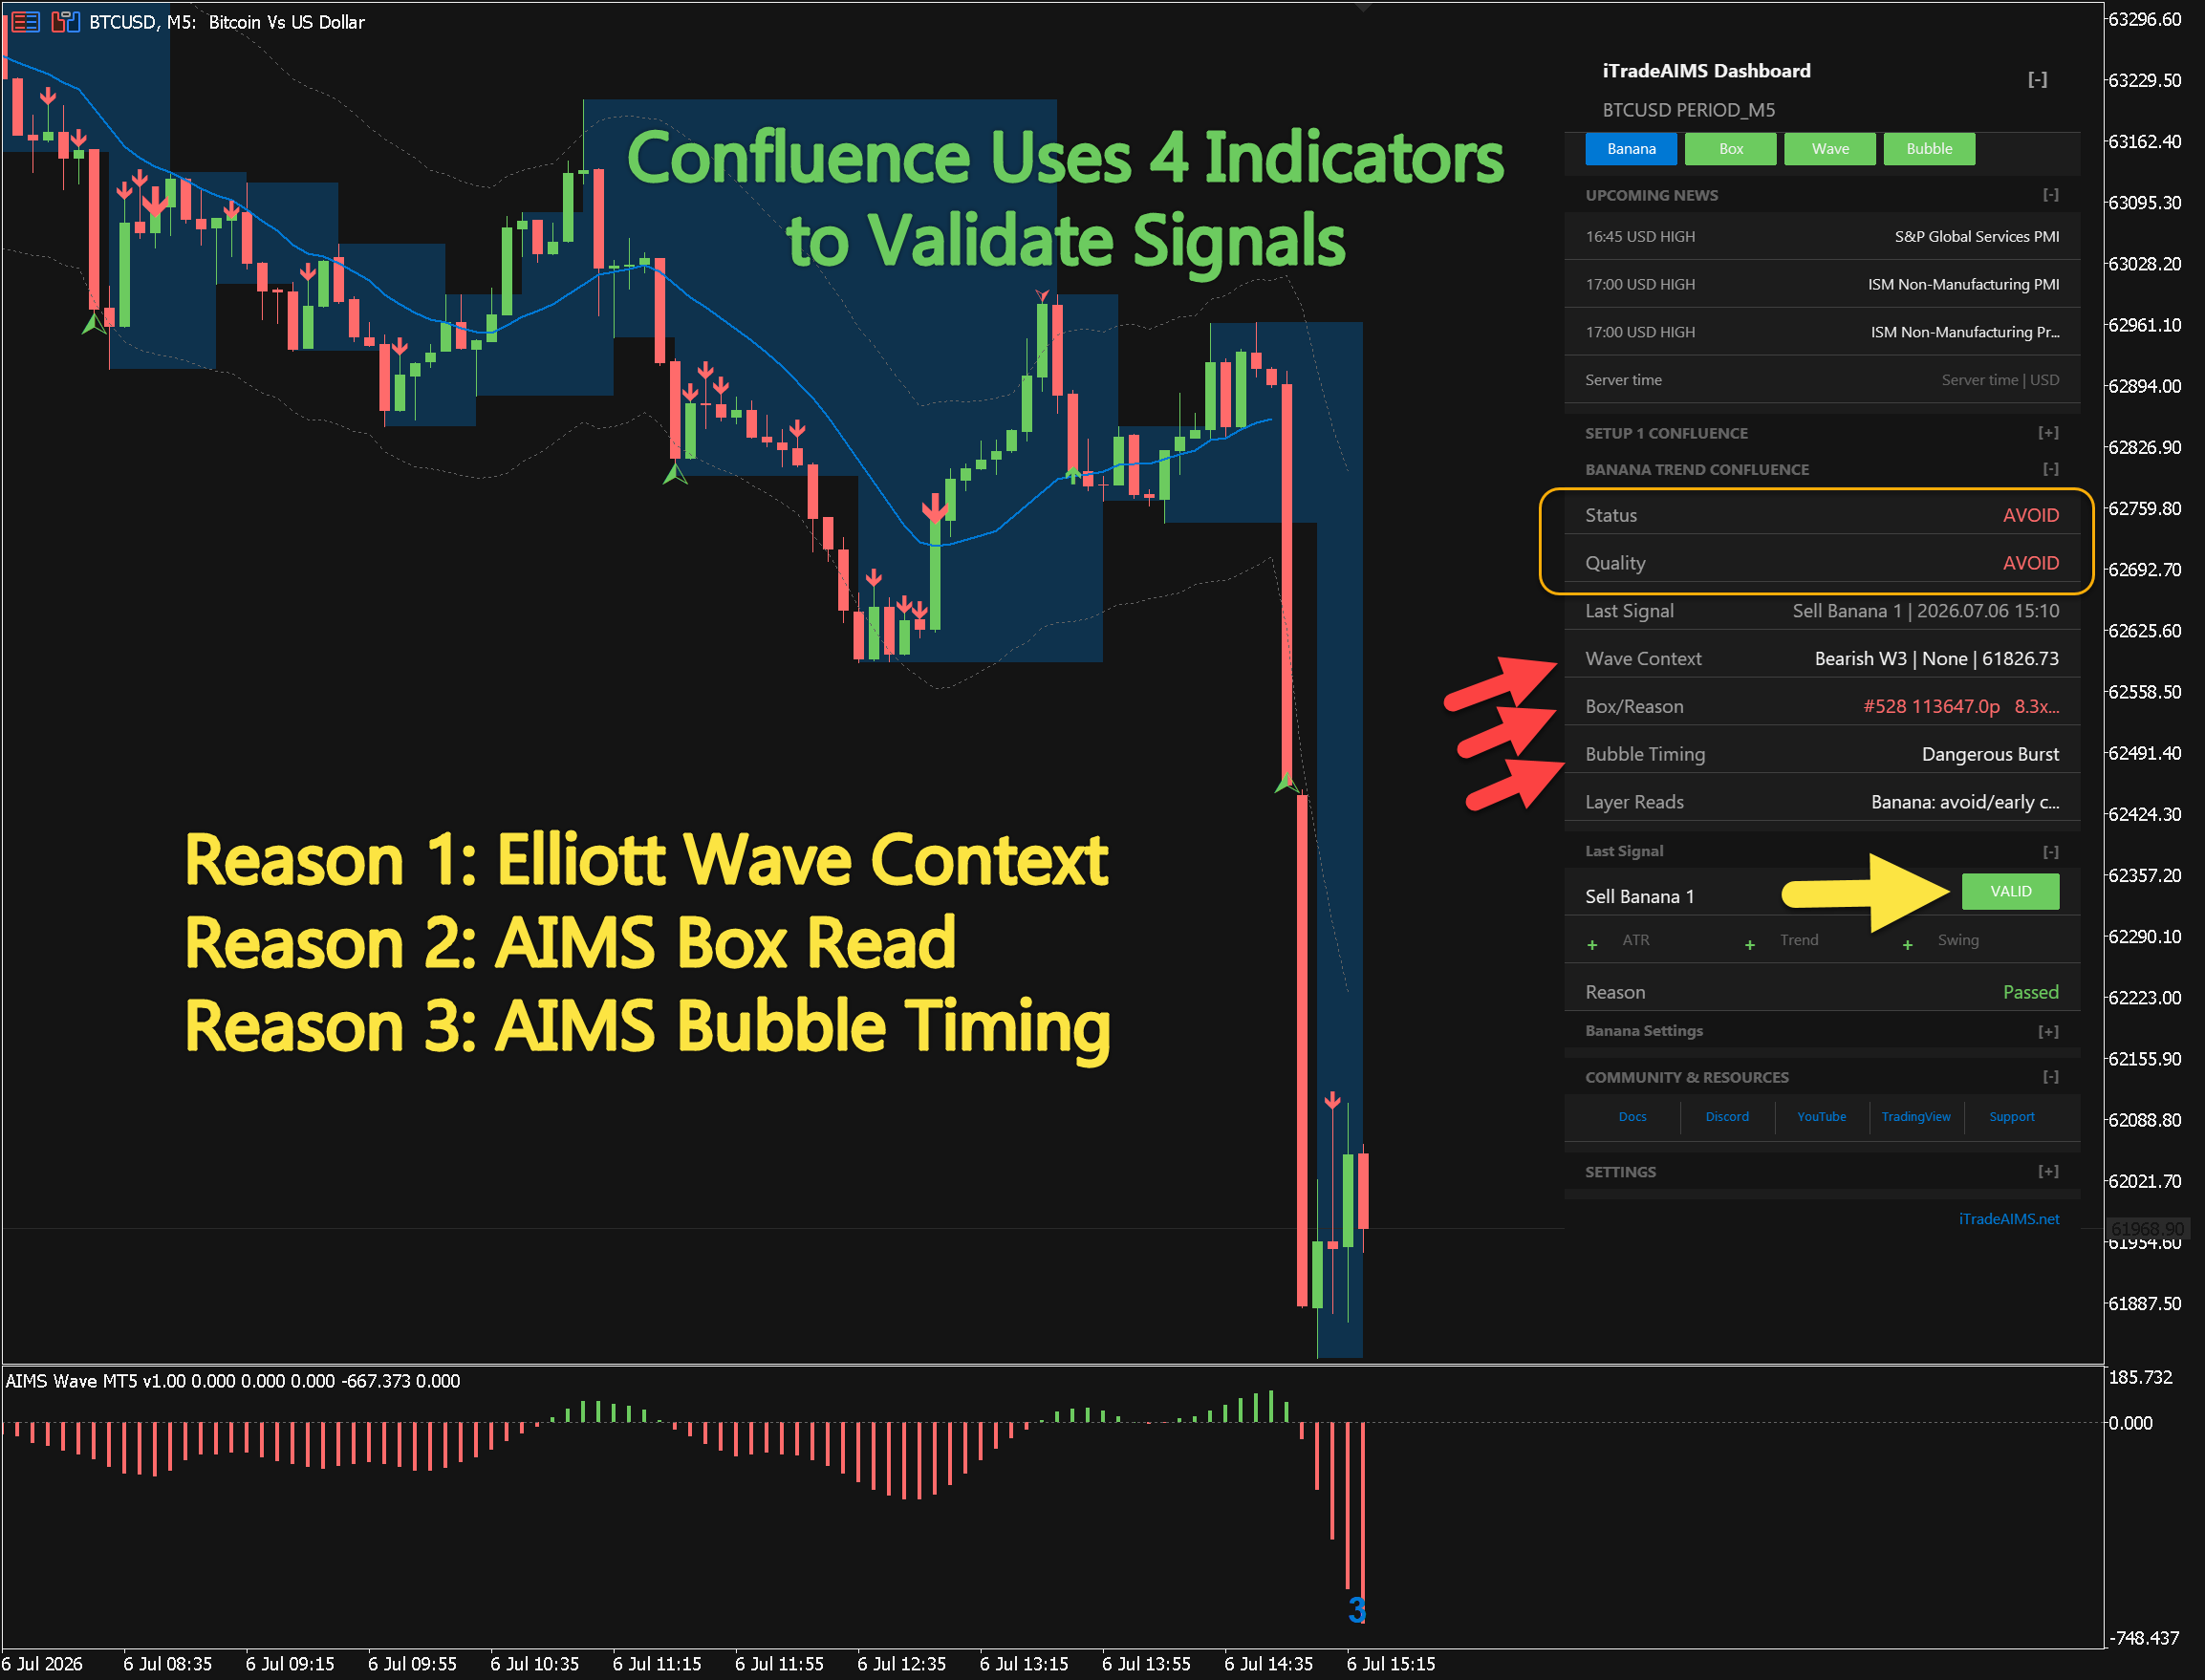
Four layers validate every signal
Confluence does not trust a single indicator in isolation. Before you act, the dashboard cross-checks:
| Layer | What it checks |
|---|---|
| Wave context | Elliott wave stage, target room, momentum warnings |
| Setup box read | Box lifecycle, compression, and Setup 1 alignment |
| Bubble timing | Extension, burst, pullback-zone timing |
| Banana signal | Last Banana or Seed marker and tab validity |
VALID on the tab, AVOID on confluence
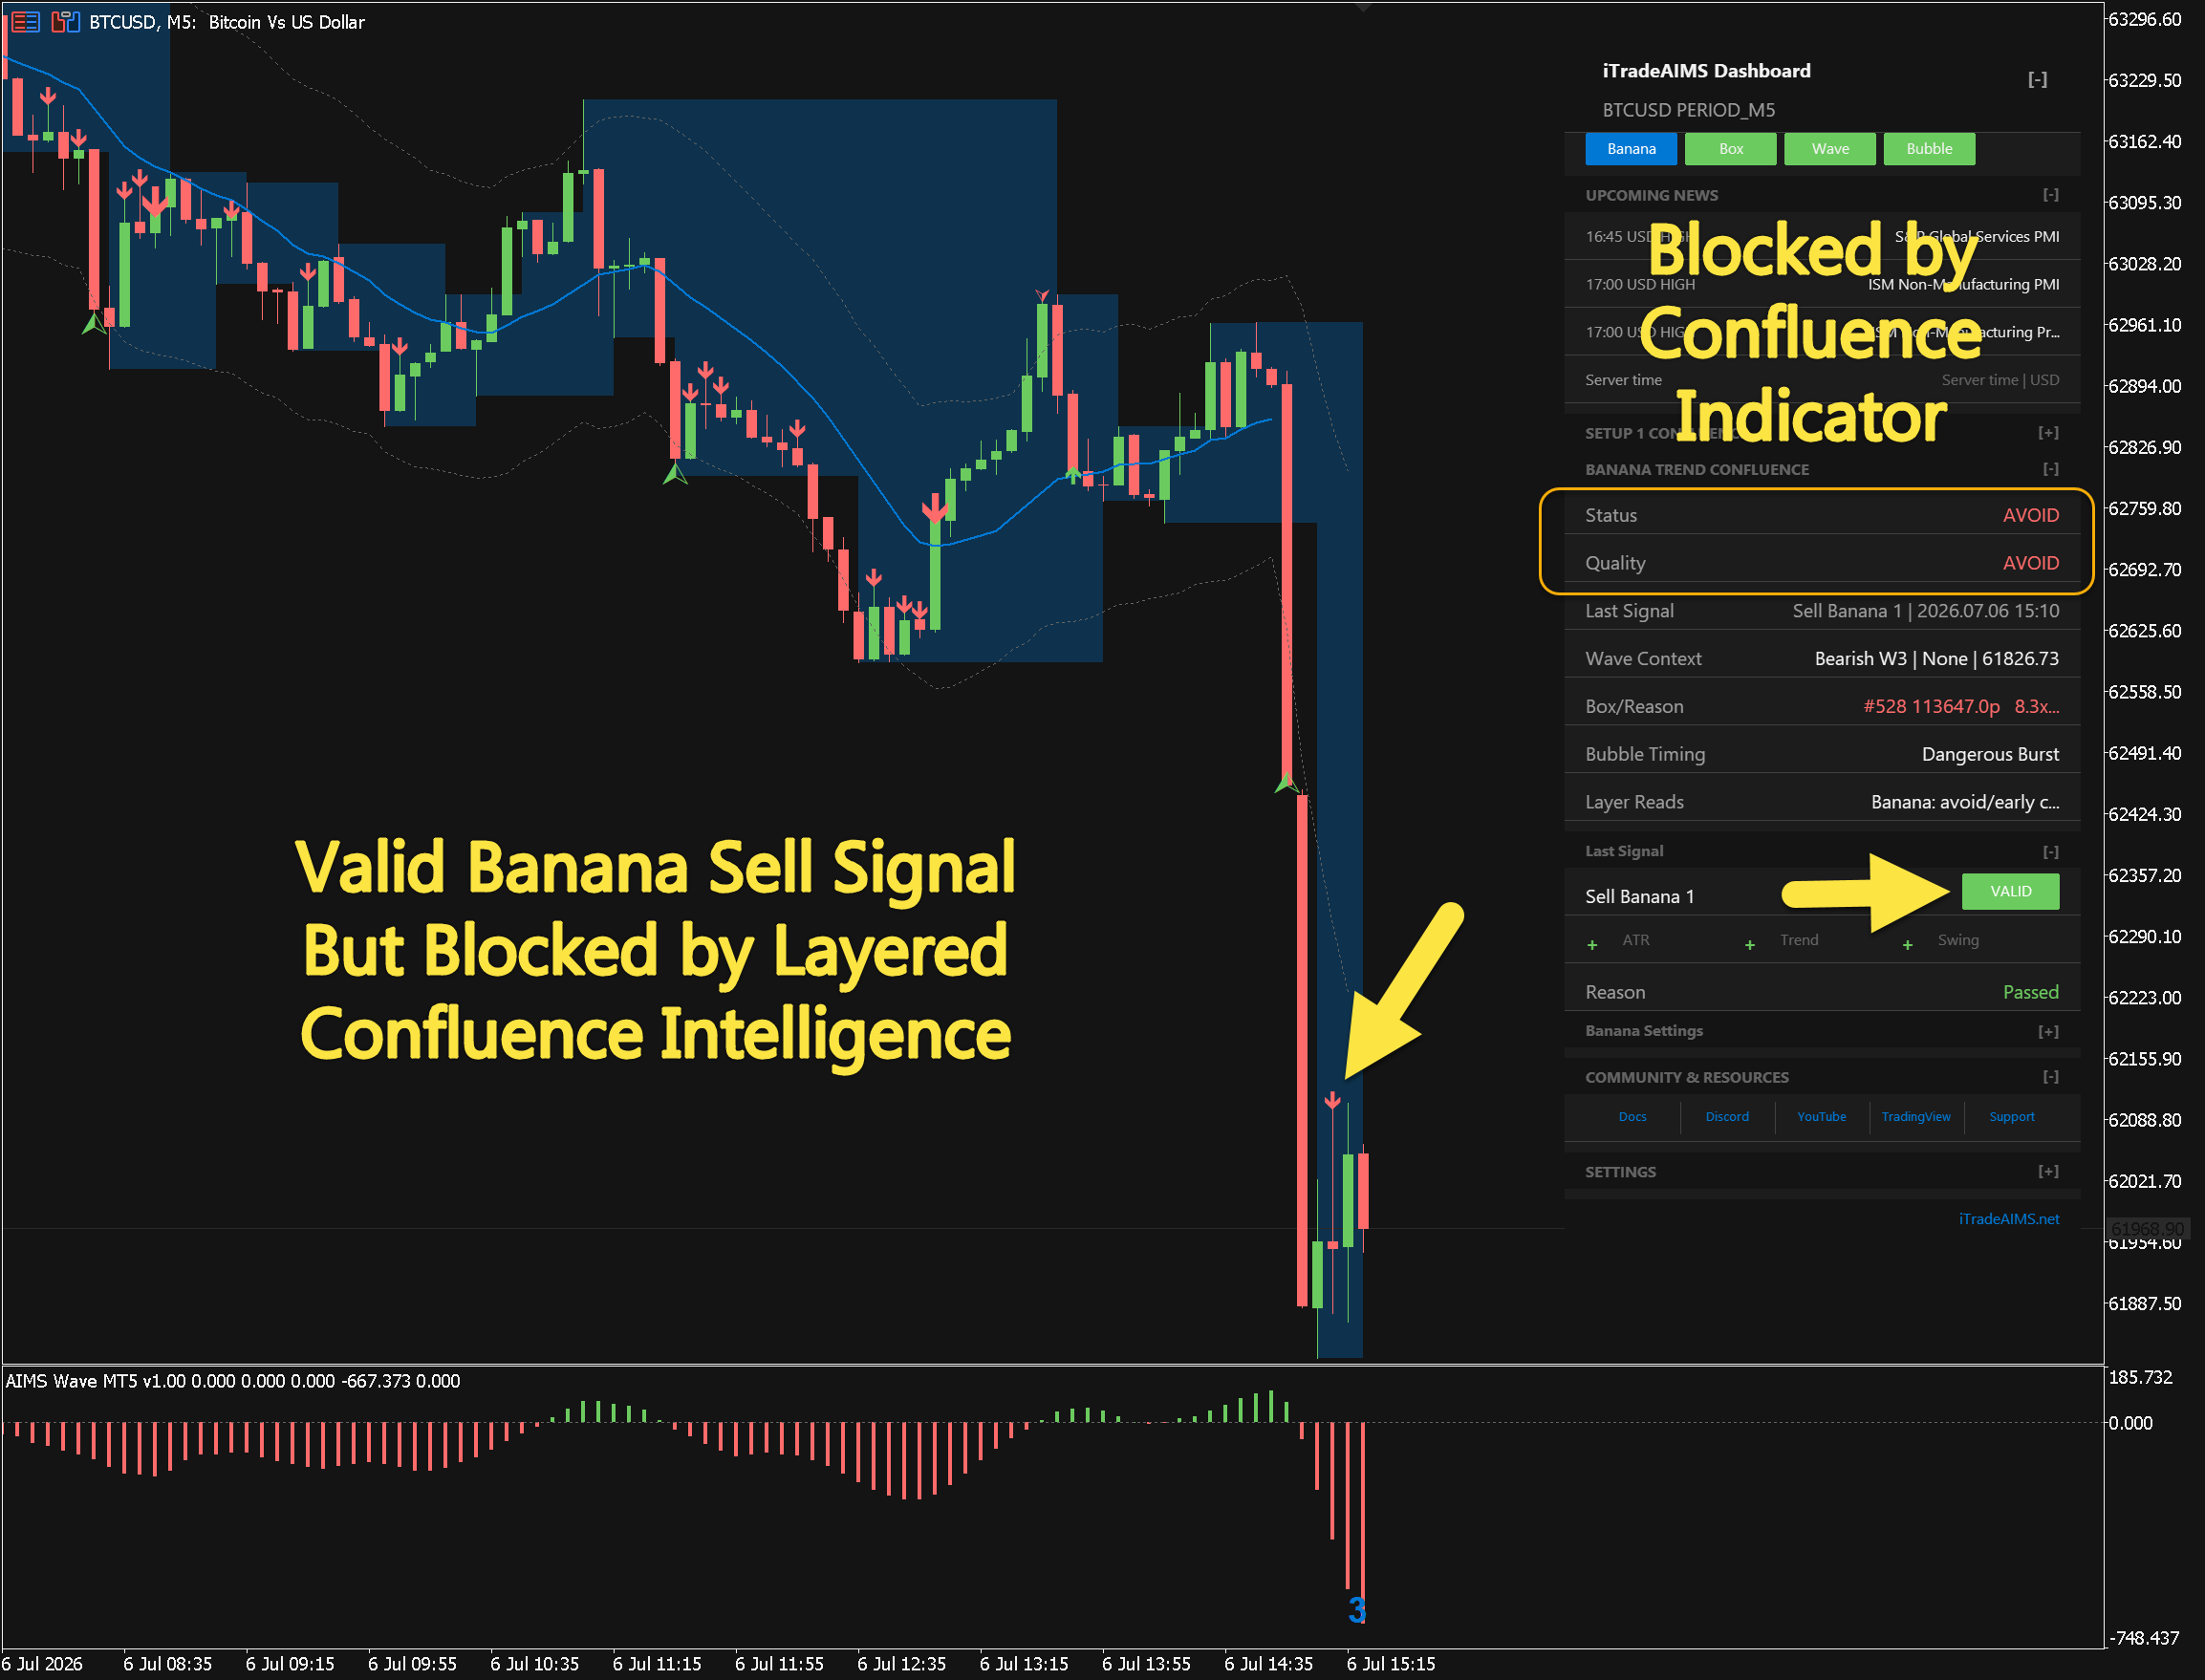
A VALID Banana sell on the tab does not always mean take the trade. When wave context and Bubble timing disagree — for example Bearish W3 with Dangerous Burst — Banana Trend Confluence can still show AVOID even though the Banana tab passed its filters.
Cross-read: Banana tab in the suite · Quality tiers
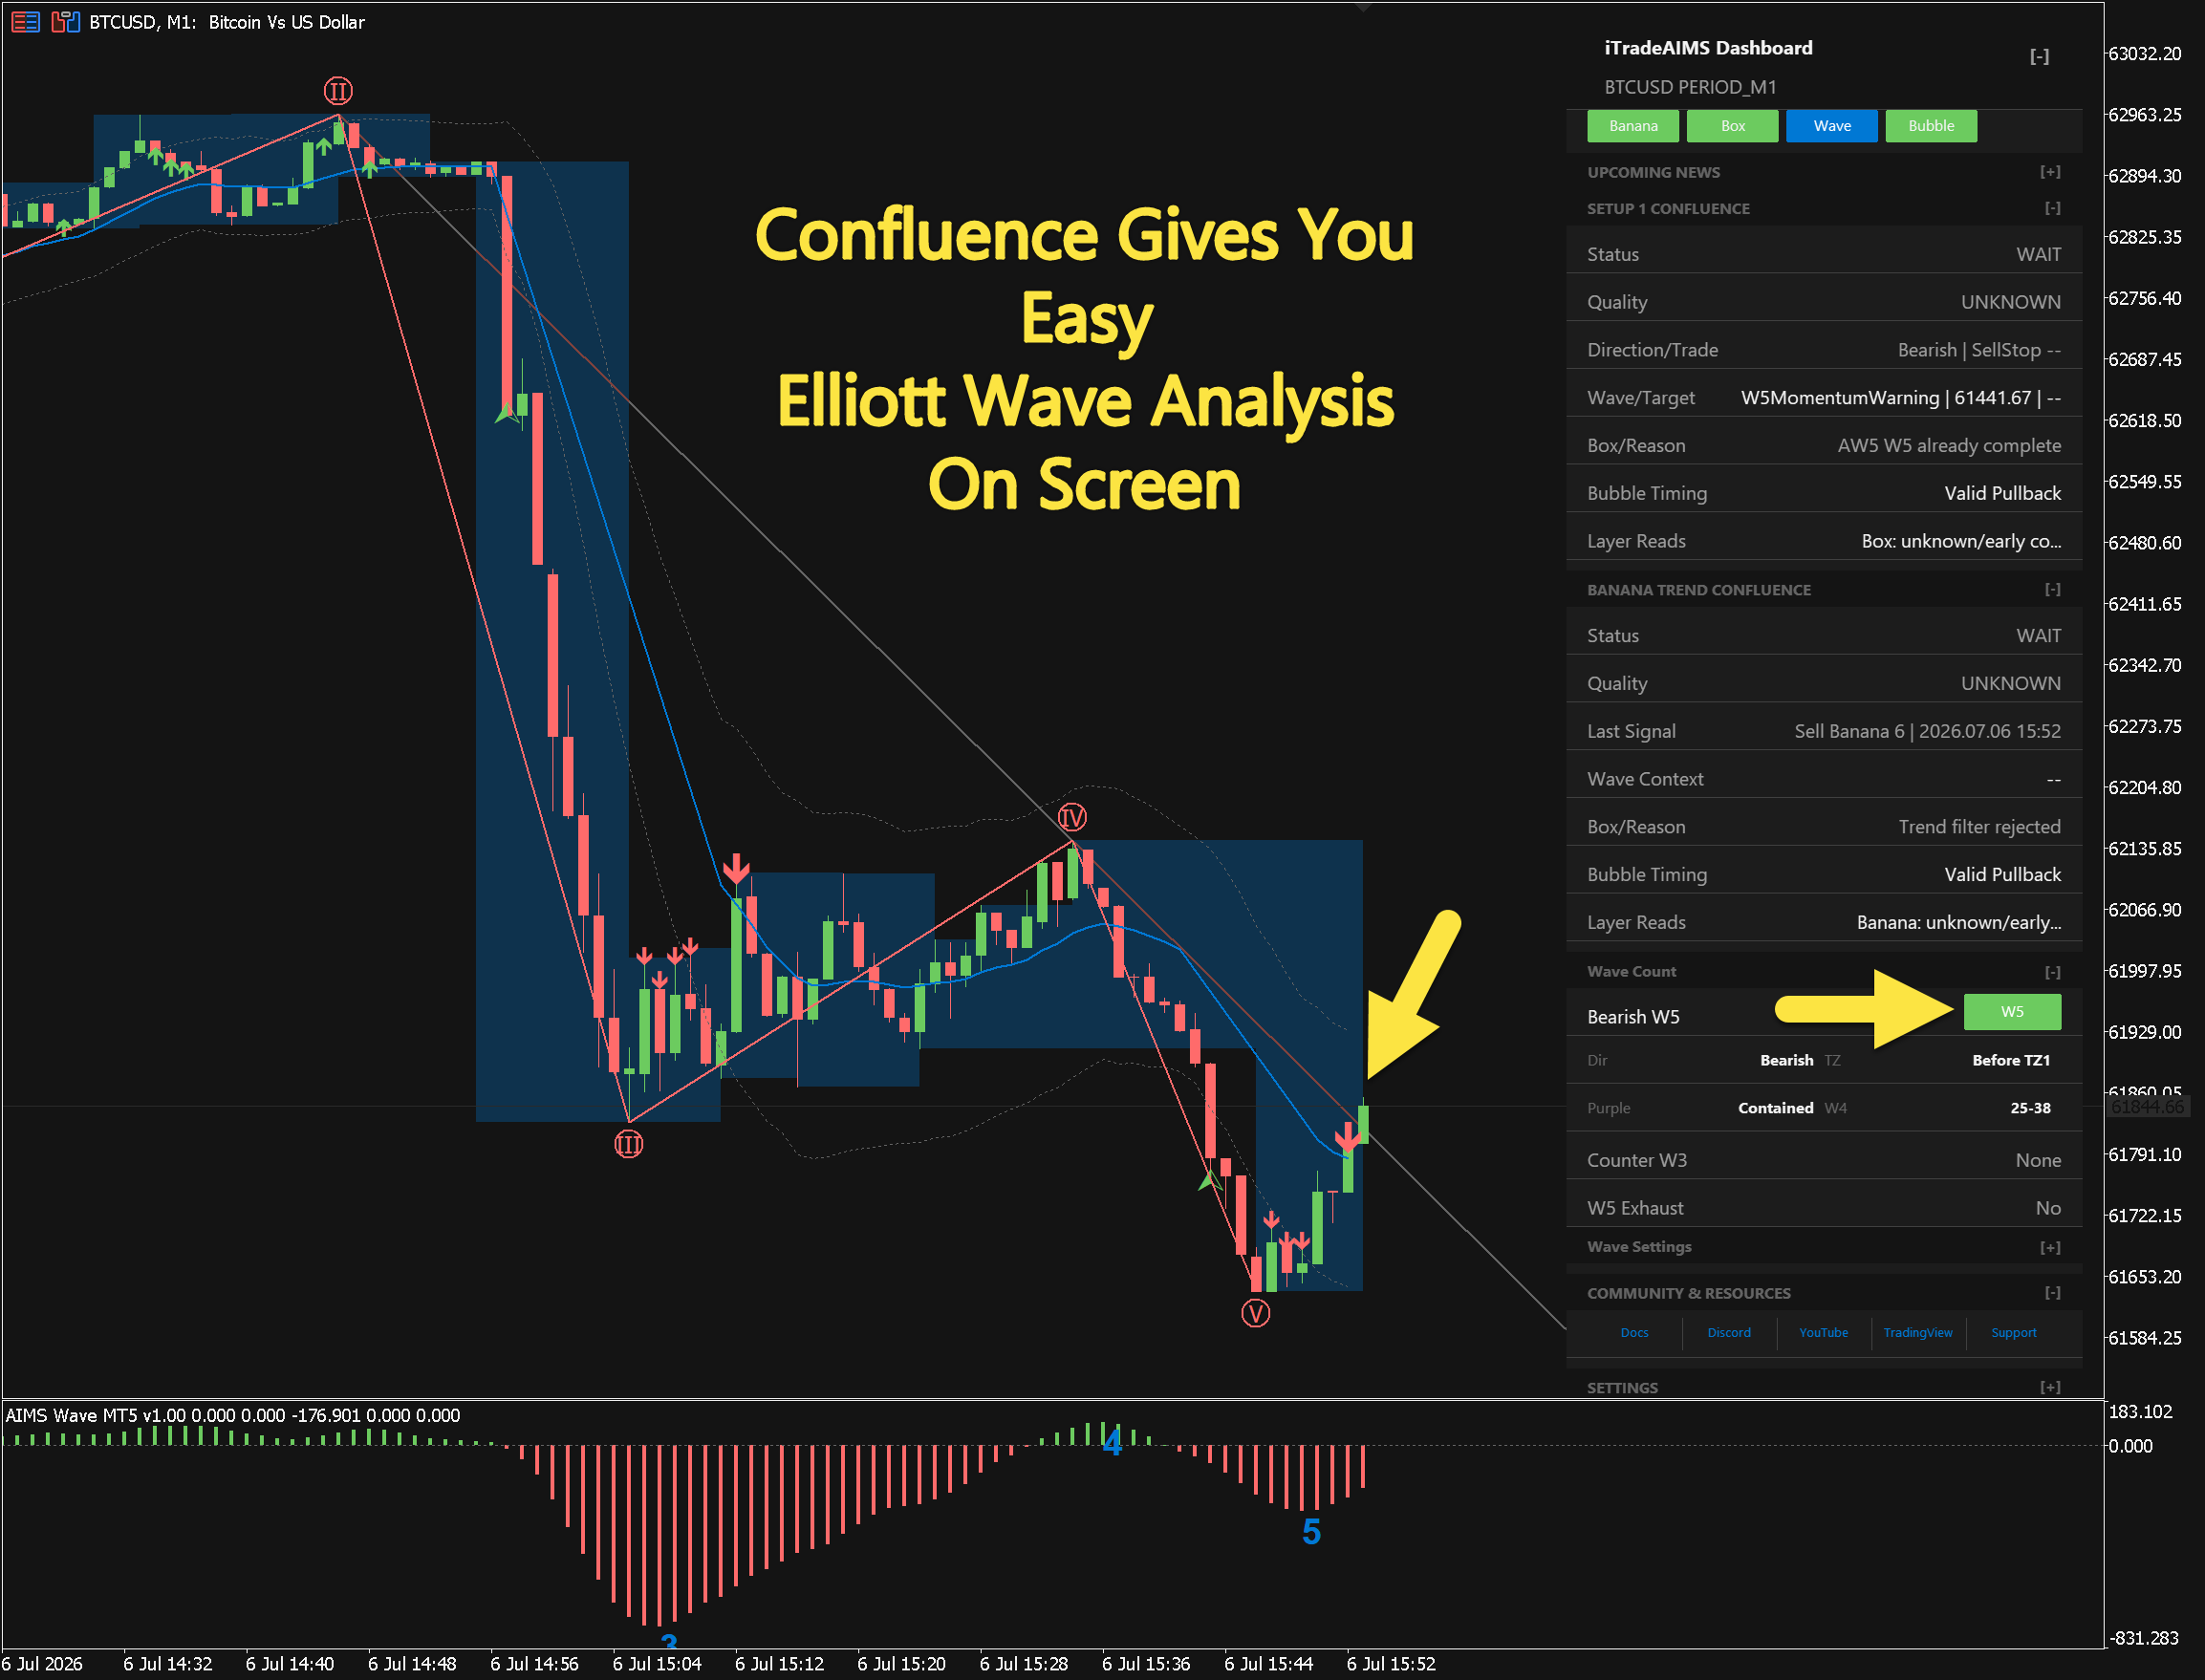
Elliott wave context on screen
AIMS Wave labels structure on the chart and in the Wave Count section — for example Bearish W5, contained Wave 4 retracement, and W5 momentum warnings. Setup 1 Confluence and Banana Confluence rows reference the same wave facts.
More: AIMS Wave in the suite
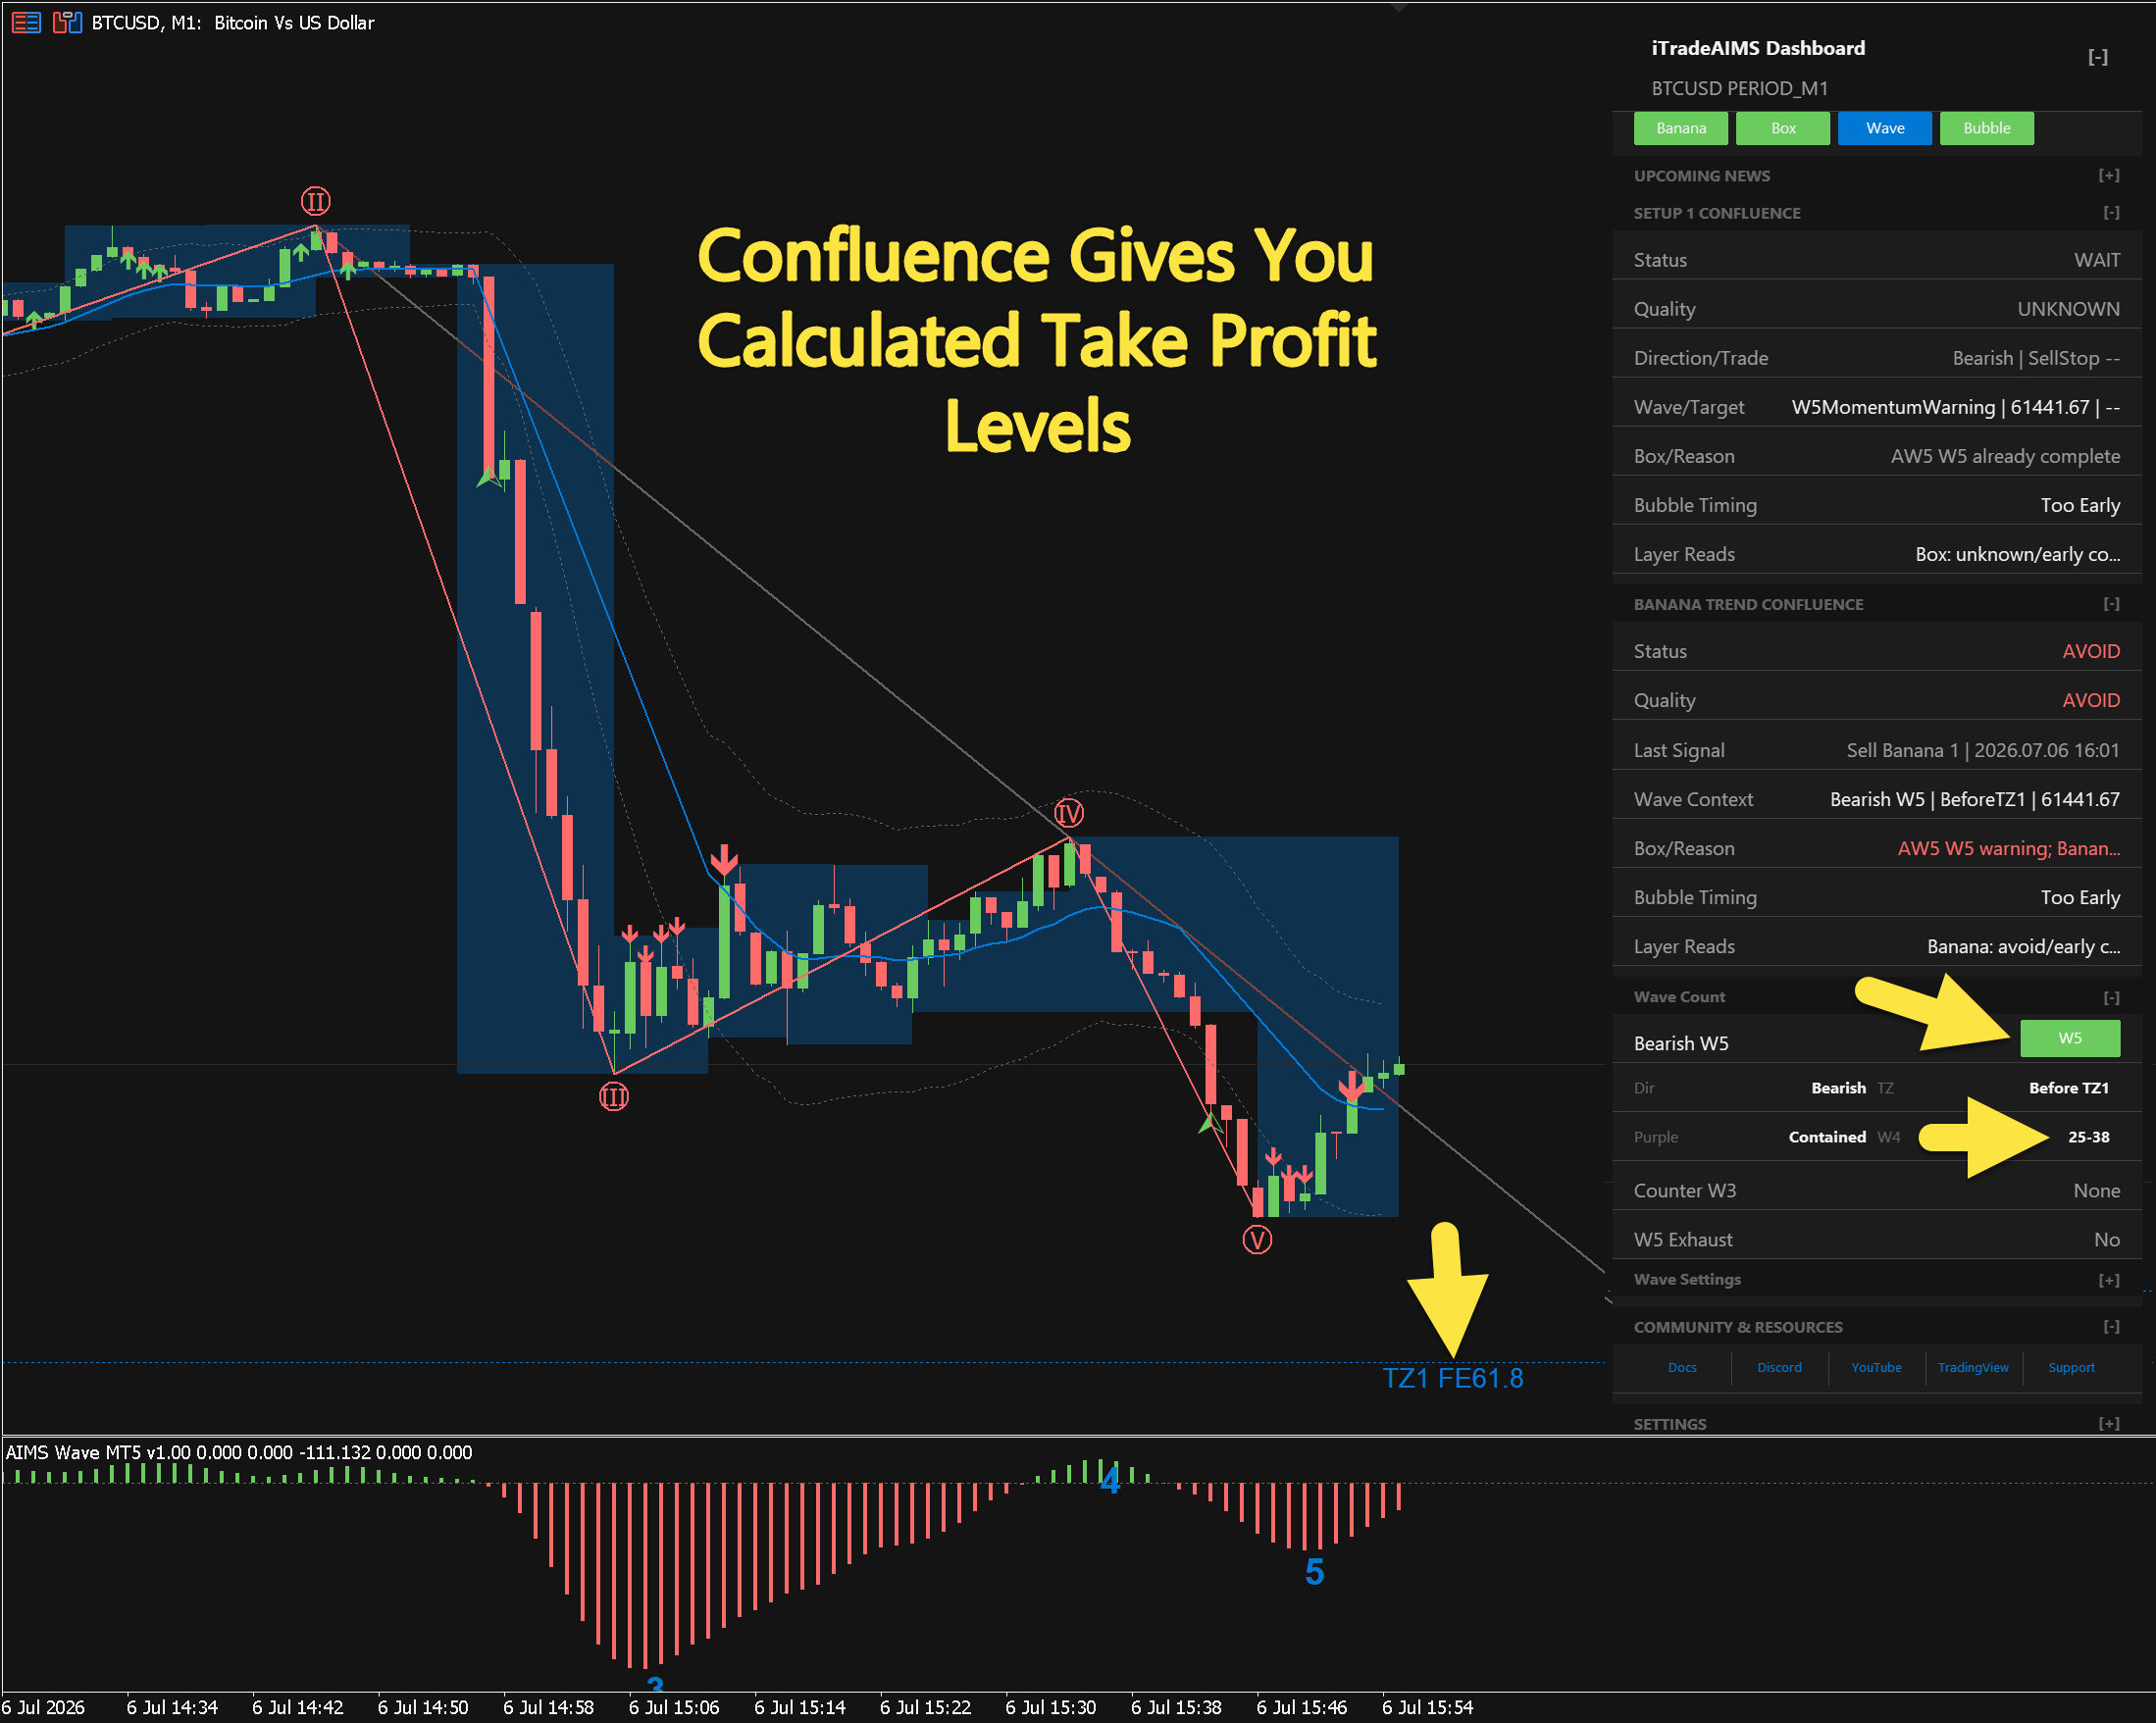
Take-profit target zones
Confluence surfaces target zones from the wave read — for example TZ1 at a Fibonacci extension — so you can see where the move may pause before you size a trade. Late extension into a target zone often downgrades quality to CAUTION or AVOID.