Quick Start Guide
Use this page after the indicator is installed. If you use MT4, the product is AIMS Box Advanced Indicator. If you use MT5, the customer-facing product name is The Setup Indicator MT5.
If you are using MT4, also keep the MT4 Guide open. The MT4 version has a compact mini dashboard, while many screenshots in this guide show the fuller AIMS Confluence Indicator dashboard experience on MT5.
Step 1: Open A Clean Chart
Start with one chart so setup is easy to check.
Recommended first setup:
- One symbol you already understand.
- One timeframe you normally watch.
- No extra indicators until the indicator is working.
- Enough chart history loaded to show recent box structures.
Step 2: Add The Indicator
MetaTrader 4
- Press
Ctrl+Nto open Navigator. - Open
Indicators > iTradeAIMS. - Drag AIMS Box Advanced Indicator onto the chart.
- In the settings window, enter your license key if required.
- Click
OK.
MetaTrader 5
- Press
Ctrl+Nto open Navigator. - Open
Indicators > iTradeAIMS. - Drag The Setup Indicator MT5 onto the chart.
- In the settings window, enter your license key if required.
- Click
OK.
Step 3: Confirm It Is Running
Check:
- The indicator name appears on the chart.
- The MT4 mini dashboard is visible if Show Minimal Dashboard or the equivalent dashboard visibility setting is enabled.
- On MT5, the
Boxtab or Box mode is selected when you want AIMS Box information. - Box zones or levels appear after the chart has enough candles.
- There is no license error on the chart.
- The Experts or Alerts tab does not show a repeated setup error.
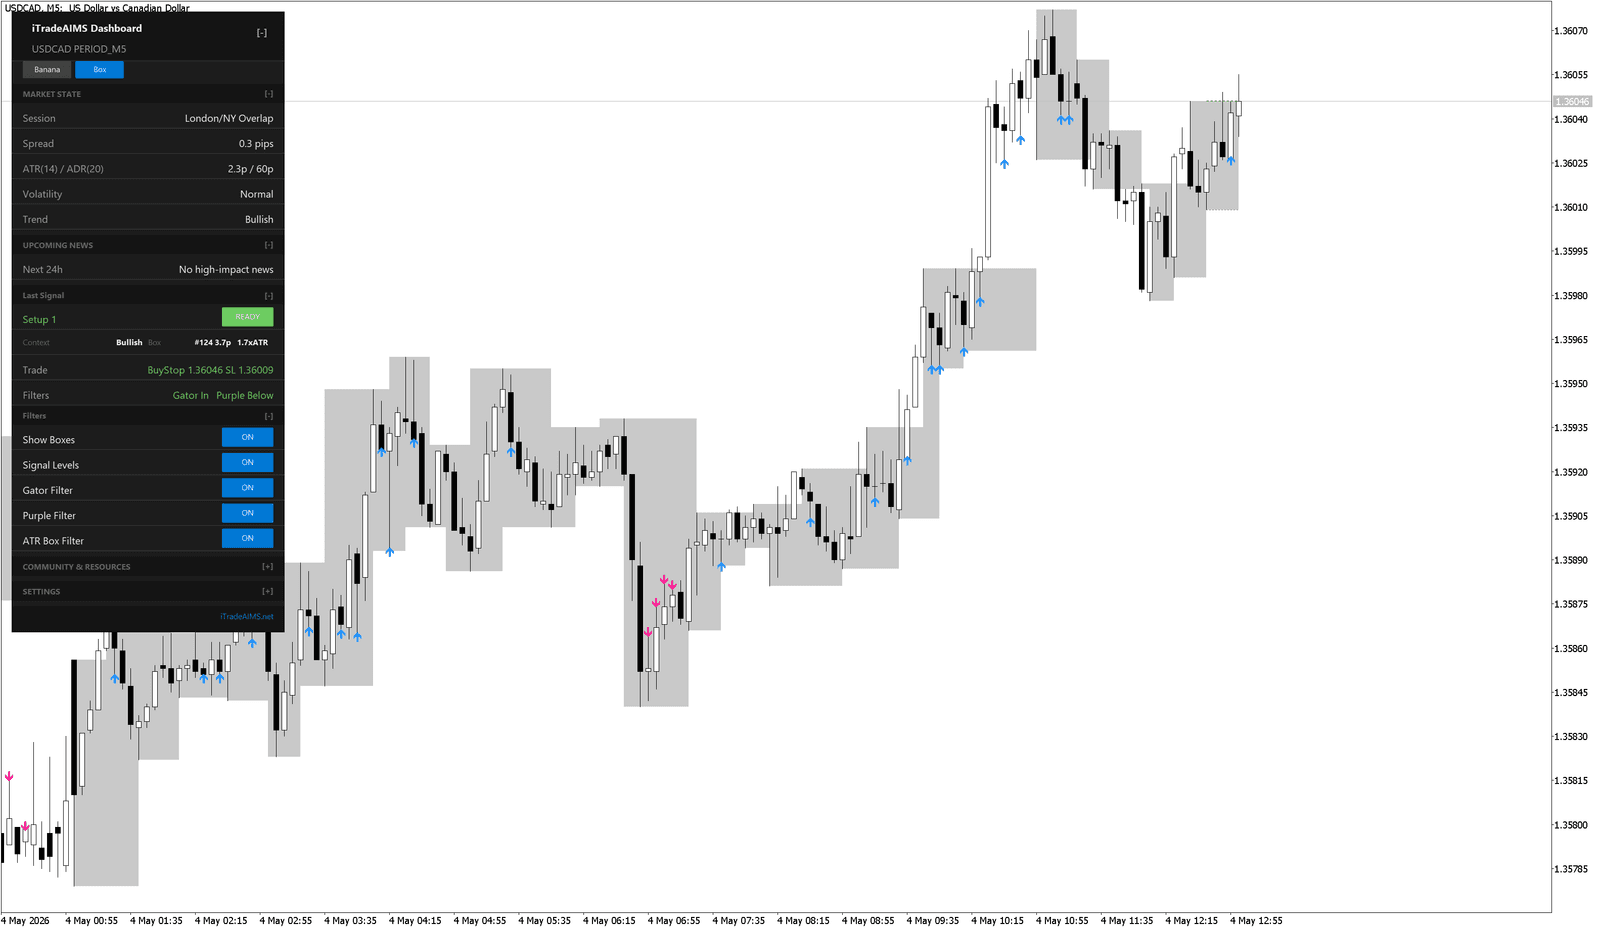
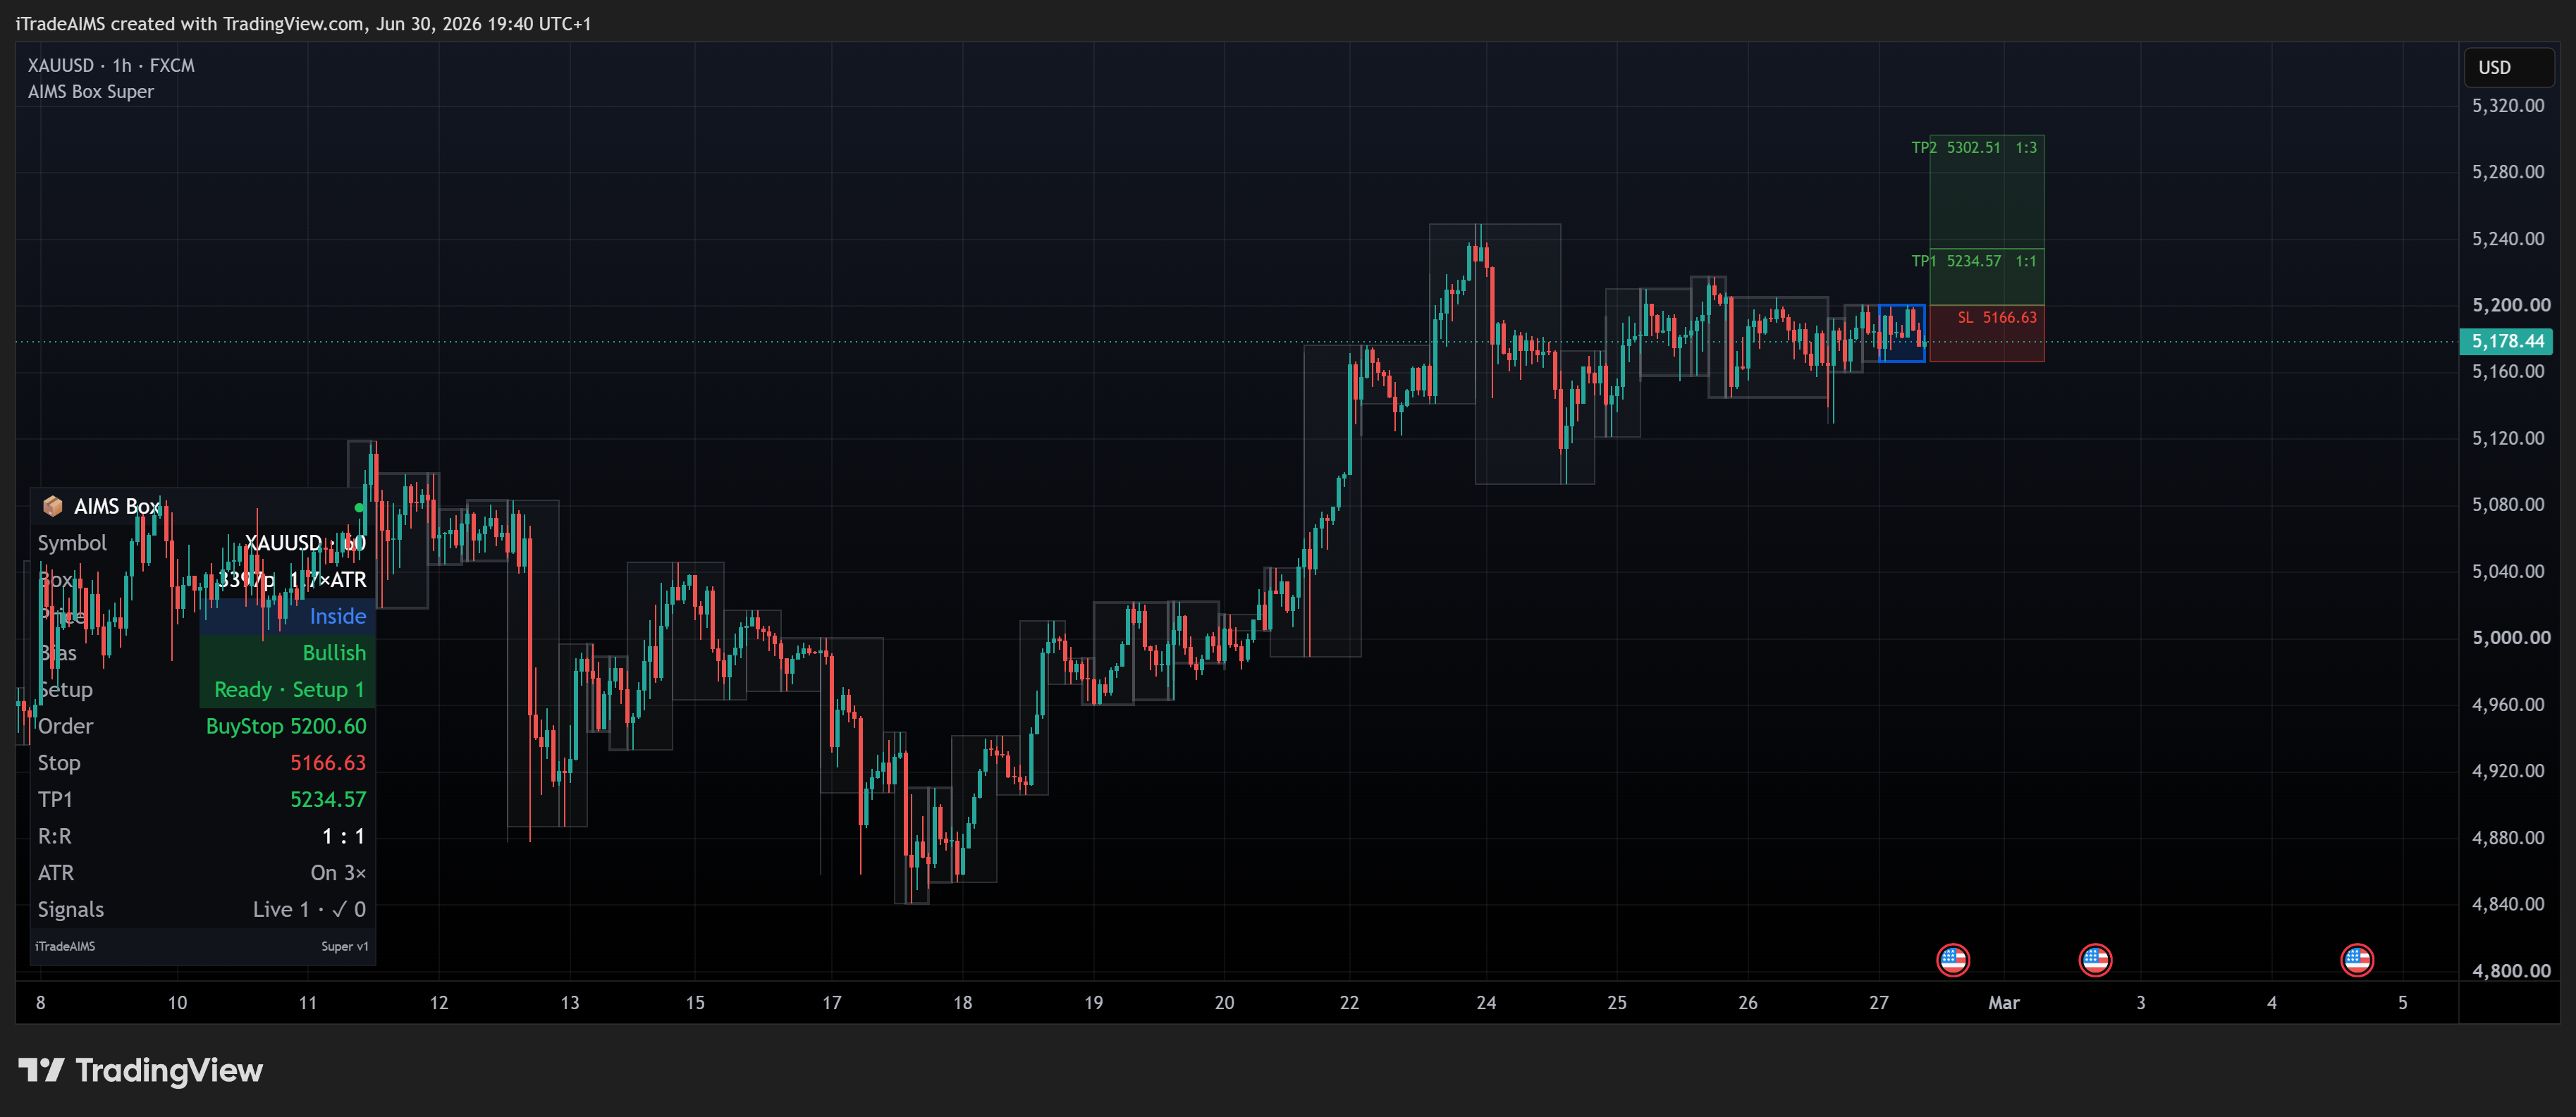
Step 4: Understand The Box State
The dashboard can show states such as:
Setup 1: a candidate setup is forming or ready for review.Setup 2: a different setup type is ready for review.Closed break: price has closed beyond the relevant box level.Blocked: a filter or risk condition does not allow the setup.
Read these states as chart information. They are not automatic trade instructions.
Step 5: Review The Box Before Acting
When a setup appears:
- Wait for the relevant candle to close.
- Check the upper and lower AIMS Box levels.
- Check whether the box is tight enough for your risk plan.
- Check Gator, Purple, ATR Box, spread, session, and news context.
- Decide whether the setup matches your plan.
Step 6: Keep Settings Simple At First
For the first few sessions, avoid changing advanced filters.
Begin with:
- Boxes or Show Boxes: on.
- Show Active Box Signal Levels or Signal Levels: on if you want level references.
- Gator Filter: on unless support or your tested plan says otherwise.
- Purple Filter: on unless support or your tested plan says otherwise.
- ATR Box Filter: on if you want tall boxes blocked by setup logic.
- Popup alerts only, if your platform version exposes alert controls and you are watching the chart.
Step 7: If Something Looks Wrong
Use this order:
- Check Troubleshooting.
- Restart or refresh MetaTrader.
- Confirm the install folder and license details.
- Try one clean chart.
- Contact support with platform, broker, symbol, timeframe, and screenshots.
Risk Reminder
The indicator shows chart information. You decide whether to trade, where to place risk, and when to stand aside.