The 7 Rules
The Banana Strategy validates setups with four validation rules (mostly automated) and three filter rules — two required, one optional (your judgment). See Banana strategy rules for workflow and videos.
Rules 1–4 are objective and carry most of the weight (~80% of the edge in course materials). Rules 5–7 refine entries for experienced traders. Beginners can focus on 1–4 until the habit is automatic.
Part 1 — Signal validation (rules 1–4)
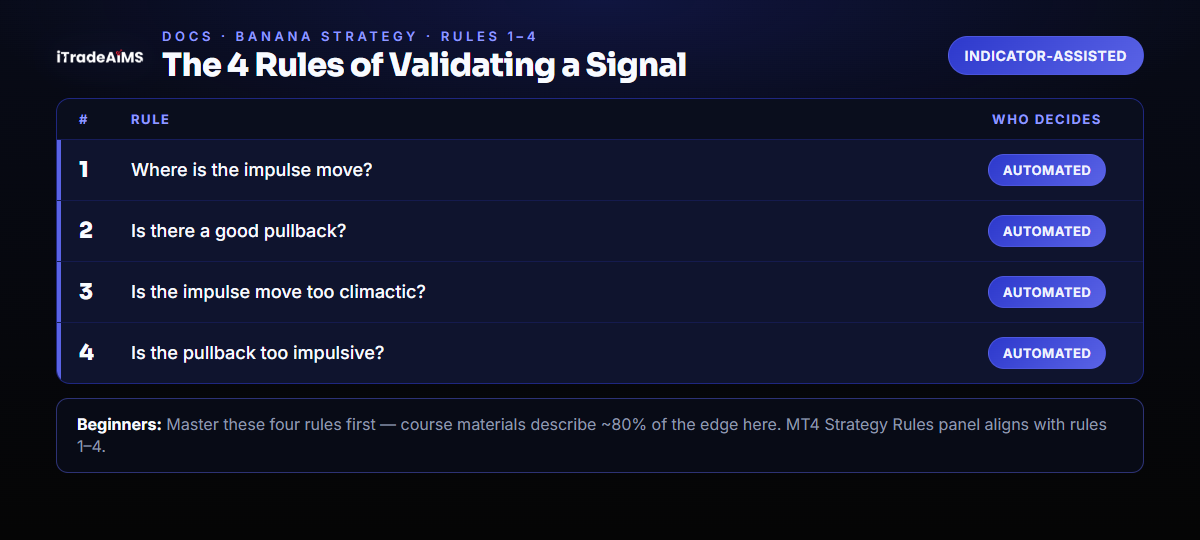
Rule 1: Where is the impulse move?
Look for: 2–3 trend candles that break out of consolidation.
Impulse wave here means a short burst of directional candles — not Elliott Wave terminology.
Two common setups:
- Range breakout — sideways market, then a sharp 2–3 candle move breaks structure.
- Trend continuation — established trend, small pause, then 2–3 candles resume the move.
| Indicator | Your review |
|---|---|
| Detects impulse sequences | Confirm momentum looks strong vs recent bars |
| Flags breakouts from consolidation | Judge whether the break is clean or messy |
| Recognises continuation legs | Fit the move into the bigger trend picture |
Rule 2: Is there a good pullback?
Look for: A clean retracement after the impulse — not too deep, not too violent.
Ideal pullback:
- Duration: 1–3 candles (up to 5 acceptable).
- Depth: Near 10 EMA (dashed) for a single-leg pullback; near 20 EMA (solid) for a two-leg pullback.
- Candle size: Smaller range than the impulse candles.
- EMAs: 10 and 20 stay separated and directional.
Single-leg pullback (preferred): Price retraces toward the 10 EMA in one clean wave.
Two-leg pullback (acceptable): Two distinct waves toward the 20 EMA — still valid if depth stays controlled.
| Indicator | Your review |
|---|---|
| Pullback depth checks (e.g. 25–50% rules) | Prefer single-leg when possible |
| Candle count via lookback settings | Ensure pullback bars are smaller than impulse bars |
| EMA separation validation | Reject deep, chaotic retracements |
The pullback is a flag pattern
The pullback in rule 2 is a classic flag: impulse (flagpole) → controlled pause (flag) → potential continuation.
Impulse (flagpole) → Pullback (flag, 1–7 candles) → Continuation
The Banana Indicator targets qualified flags — not every pause counts. Poor flags (too deep, too impulsive) are filtered out in rules 3–4.
Rule 3: Is the impulse move too climactic?
Avoid: The rubber-band effect — price stretched too far, too fast, with a large gap to the moving averages.
Problems with climactic impulses:
- Overstretched price vs EMAs.
- Elevated reversal risk.
- Poor risk/reward at entry.
Visual check:
- Price should sit reasonably near the 10 EMA — not miles above/below.
- EMAs should follow price, not lag far behind.
- Reject blow-off legs before a signal.
| Indicator | Your review |
|---|---|
| ATR / volatility filters | Eyeball distance from dashed 10 EMA |
| Lookback structure checks | Skip parabolic legs |
You want a controlled pullback entry — not chasing a vertical spike.
Rule 4: Is the pullback too impulsive?
Look for: Weak pullback candles — inside bars, dojis, small bodies — not strong counter-trend momentum.
Red flags:
- Pullback candles as large as the impulse leg (trend may be failing).
- Price falls back into the prior range (breakout failed).
- 10 EMA points against the trade — down in a bullish setup, up in a bearish setup.
| Indicator | Your review |
|---|---|
| Minimum pullback depth filters | Scan bar size and wick behaviour |
| Directional / EMA alignment filters | Confirm 10 EMA still slopes with the trade |
In an uptrend you want sellers fading, not slamming the bid. In a downtrend, buyers should be giving up, not aggressively lifting.
Part 2 — Signal filtering (2 rules + 1 optional)
Rules 5–6 are context filters you apply after 1–4 pass. Rule 7 is optional — use when you know market-cycle framing from the course.
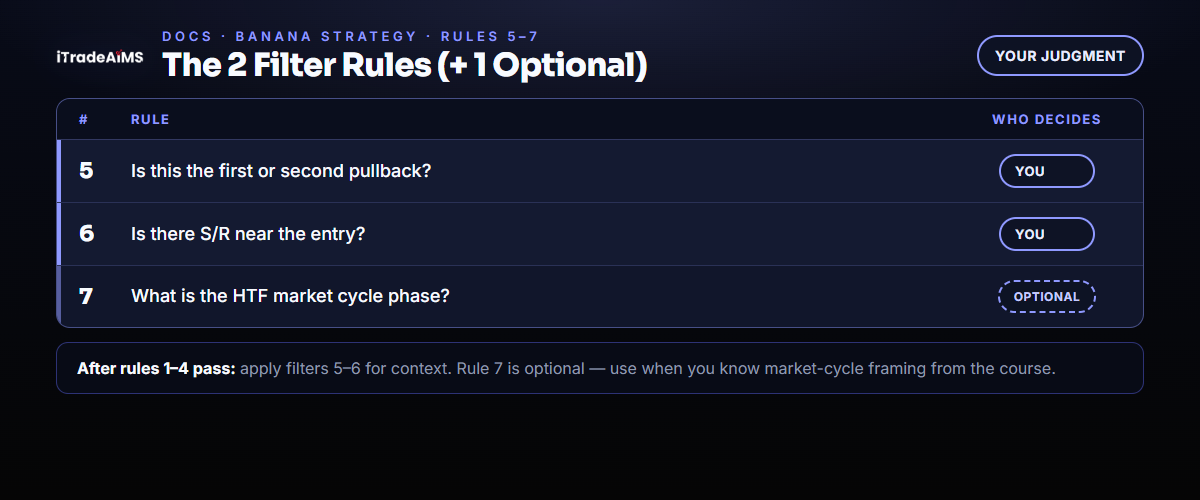
Rule 5: First or second pullback?
Goal: Enter trends early, not after exhaustion.
| Pullback # | Typical use |
|---|---|
| 1st | Best risk/reward; full size and standard targets |
| 2nd | Still solid; normal management |
| 3rd | Lower odds; tighten targets |
| 4th+ | Usually pass — trend may be tired |
The dashboard / session stats can help you estimate how many patterns fired today — but count pullbacks on the chart yourself.
Rule 6: S/R near entry?
Goal: Avoid entries pinned against a ceiling or floor.
Clear path (good):
- No major S/R directly in the way of the next leg.
- Prior swing barriers already broken.
Interference (bad):
- Range high/low immediately above/below entry.
- Obvious pivot zone from a higher timeframe.
- Recent strong rejection level.
Swing vs S/R: Not every minor swing is major S/R. Focus on range boundaries from the higher timeframe.
Examples:
- Day trading (H1 / M5): Confirm H1 is out of range before trusting M5 continuations.
- Scalping (M5 / M1): Need clear structure on at least one of those frames.
Draw HTF range lines when in doubt.
Rule 7: Higher-timeframe market cycle? (optional)
Goal: Line up lower-timeframe signals with HTF momentum when you use market cycle framing from the course.
If HTF is breaking out / trending:
- Wait for an LTF pullback signal — do not chase vertical HTF legs.
If HTF is in pullback:
- Wait for LTF to confirm resumption (e.g. break of pullback extreme) before adding risk.
Common pairs:
| Higher TF | Lower TF | Style |
|---|---|---|
| D1 | H1 | Position |
| H4 | H1 | Swing |
| H1 | M15 | Day |
| M5 | M1 | Scalp |
This raises probability — it is not a guarantee. If market cycle is new to you, learn it in the membership course before leaning on rule 7.
Importance hierarchy
| Weight | Rules | Nature |
|---|---|---|
| ~80% | 1–4 | Objective; indicator-assisted |
| ~20% | 5–7 | Discretionary; 5–6 required when you filter; 7 optional |
Master 1–4 first. Layer 5–6 when your platform, timeframe, and plan are stable. Add 7 when you use market-cycle framing.
Next steps
- Banana strategy rules — workflow and dashboard
- Validate a signal — printable checklist
- Signal detection — markers on MT4, MT5, TradingView