Signal Detection
The Banana Indicator places visual markers on the chart when its platform-specific signal conditions are met.
This page explains what the indicator is trying to detect. It does not describe source code or guarantee that a marked signal should be traded.
The Core Idea
The Banana Indicator is built around pullback-style market structure. A pullback is a pause or retracement after price has moved in one direction. The useful question is not simply "did price pull back?" The useful question is whether the pullback still belongs to a clear market move and whether the chart context remains clean enough to review.
The tutorial explains that The Banana Indicator developed from Setup One, Hunt, Seed, and pullback concepts. In practical use, the indicator helps you find chart areas where a move, pause, and possible continuation may deserve attention.
More Than A Generic Pullback Marker
Most traders can see basic pullbacks on a clean chart. The Banana Indicator is intended to narrow that idea by combining several kinds of context, depending on platform and settings:
- A prior impulse move or directional push.
- A pullback that is not too aggressive for the original move.
- Breakout, retest, or range-break context.
- Fibonacci-style minimum or maximum pullback qualification.
- Trend, ATR, swing, or impulse filters where available.
- Dashboard validation feedback on MetaTrader versions.
These checks help explain why a marker appears, why a candidate signal may be rejected, or why a signal still needs manual review.
Banana Signals
Banana signals are the main chart markers most users review first.
On MetaTrader versions, Banana counts from 1 to 7 can appear. These numbers represent different pullback-pattern lengths and criteria. A higher number is not automatically a better trade, and a lower number is not automatically weaker. Read the number as a signal type, then validate the chart context.
Seed Signals
Seed signals are earlier or developing markers. They can help you observe a setup forming, but they can also make a chart busy.
Use Seed signals when you understand why you want the earlier information. If the chart feels crowded, hide Seed signals first and focus on Banana signals.
Buy And Sell Markers
Buy markers usually appear below or near the candle. Sell markers usually appear above or near the candle.
The exact marker shape, color, number, or dot style depends on your platform and settings.
TradingView v3: B# and S# labels
On The Banana Indicator TV (Pine v6), main markers use B# (buy) and S# (sell) labels with an optional glow — not the MT4/MT5 numbered Banana 1–7 series. Labels print on confirmed bar close (non-repainting).
When a signal is live, v3 also draws entry / stop / TP1 / TP2 / invalidation zones and populates the Pine dashboard (trend, RSI, LONG or SHORT row).
TradingView signal gallery (B1 · B2 · S1 · S2)
Owner teaching crops — what B# / S# labels look like on chart before you validate or alert:
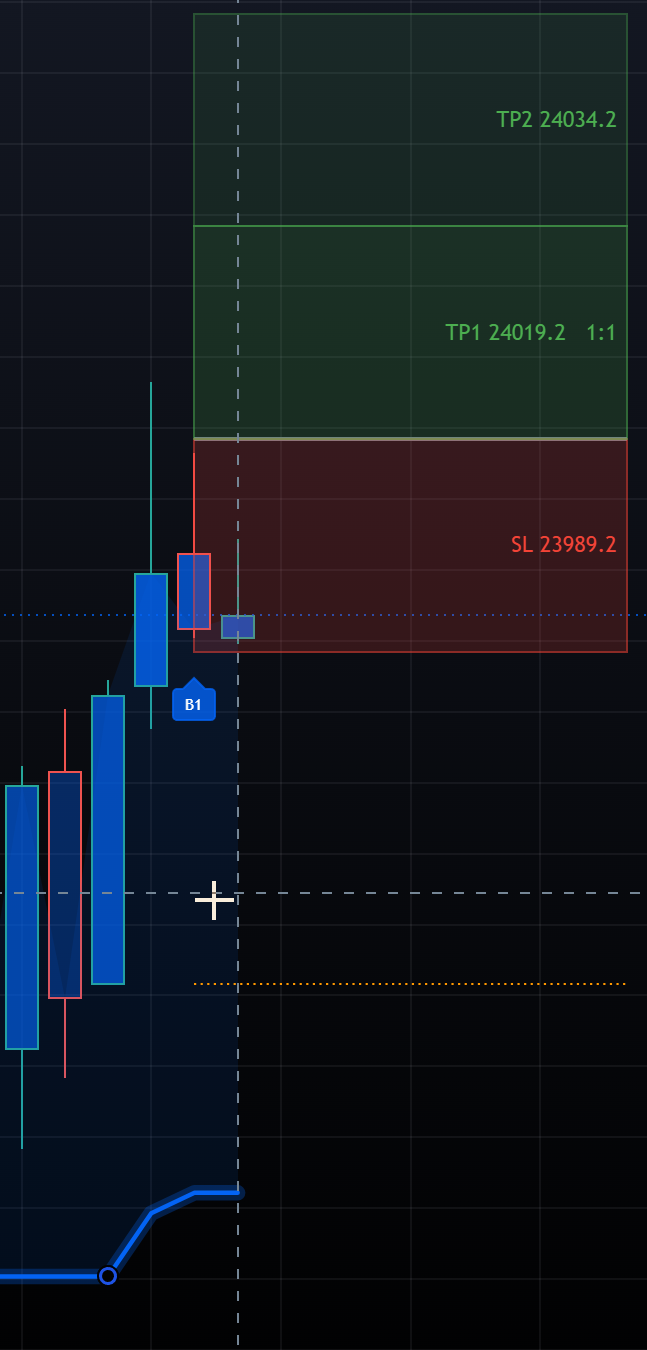
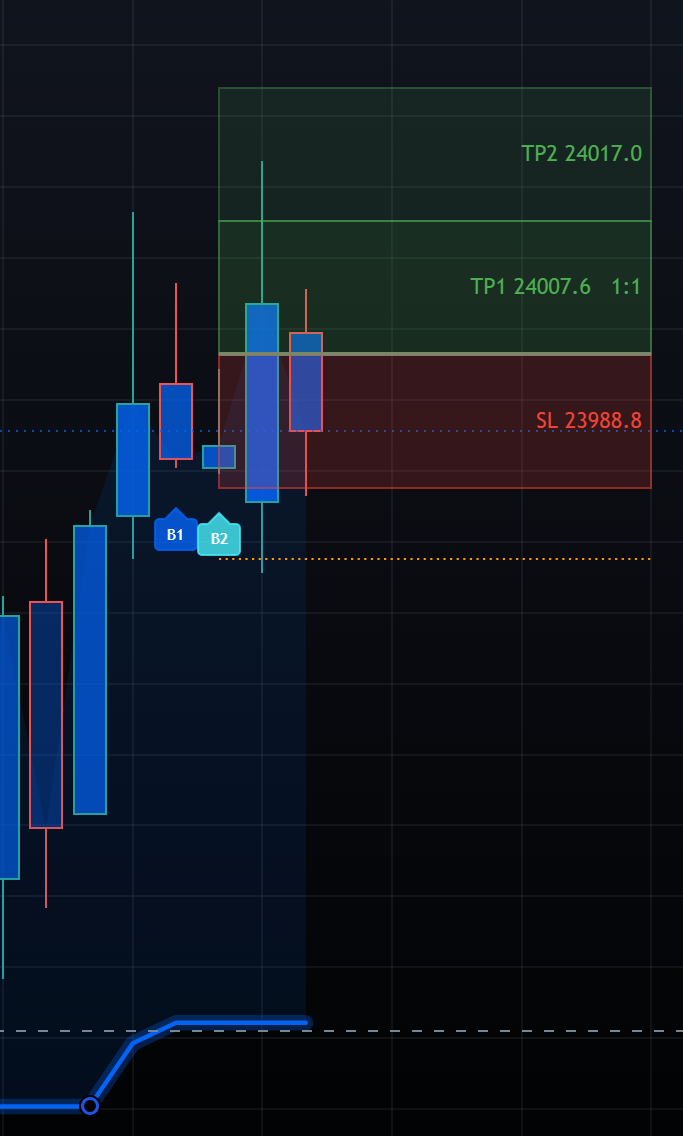
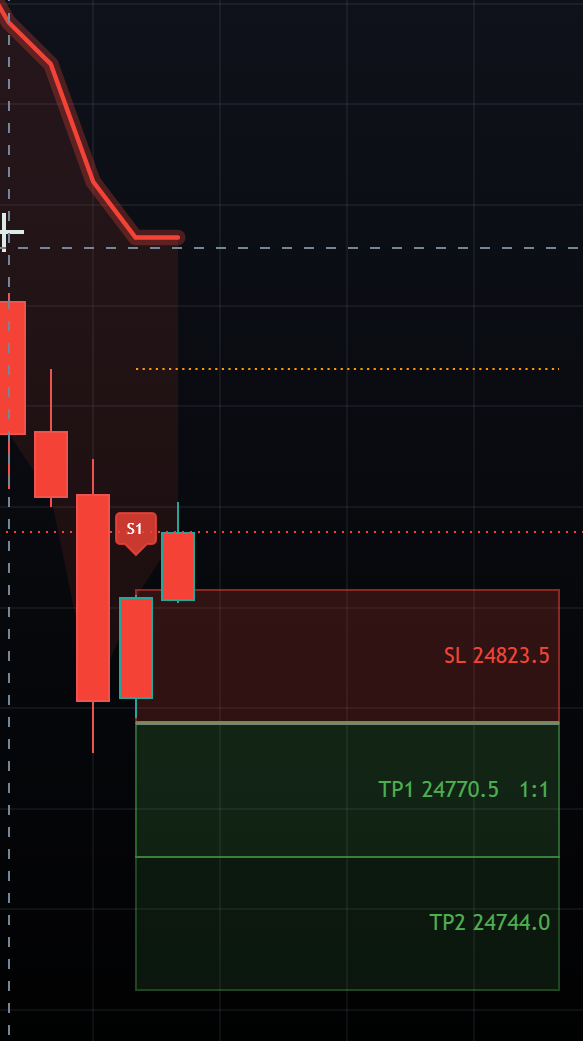
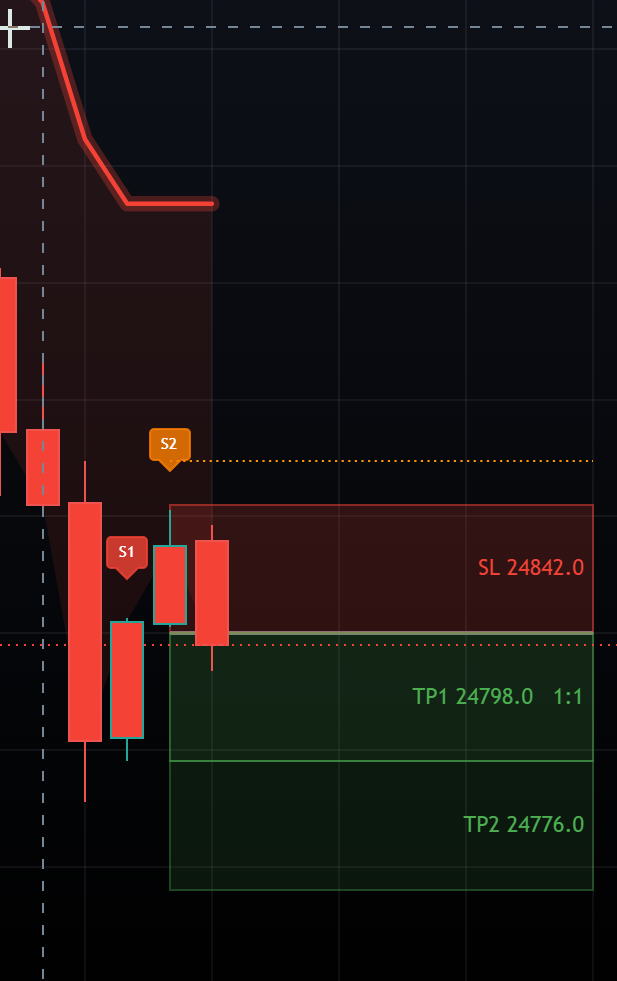
Full XAUUSD walkthroughs (wins, trail, stops): Signals — B1 · B2 · S1 · S2
Confirmed-Candle Use
Do not treat a marker on a forming candle as a finished setup. Wait for the candle to close before making a decision.
MetaTrader users should remember that the newest candle keeps changing until it closes. TradingView users should also check whether an alert is configured for intrabar or bar-close behavior.
Valid And Rejected Signals
On MetaTrader, the dashboard can show whether the latest candidate signal is VALID or INVALID.
The indicator uses platform-specific checks before a candidate signal is treated as valid. Some checks are internal. Others are visible as filter controls or dashboard status items, such as trend, ATR, swing, or impulse.
If the dashboard says a signal is invalid, read the Reason row. For example, Trend filter rejected means the signal pattern appeared, but the trend check did not agree with it.
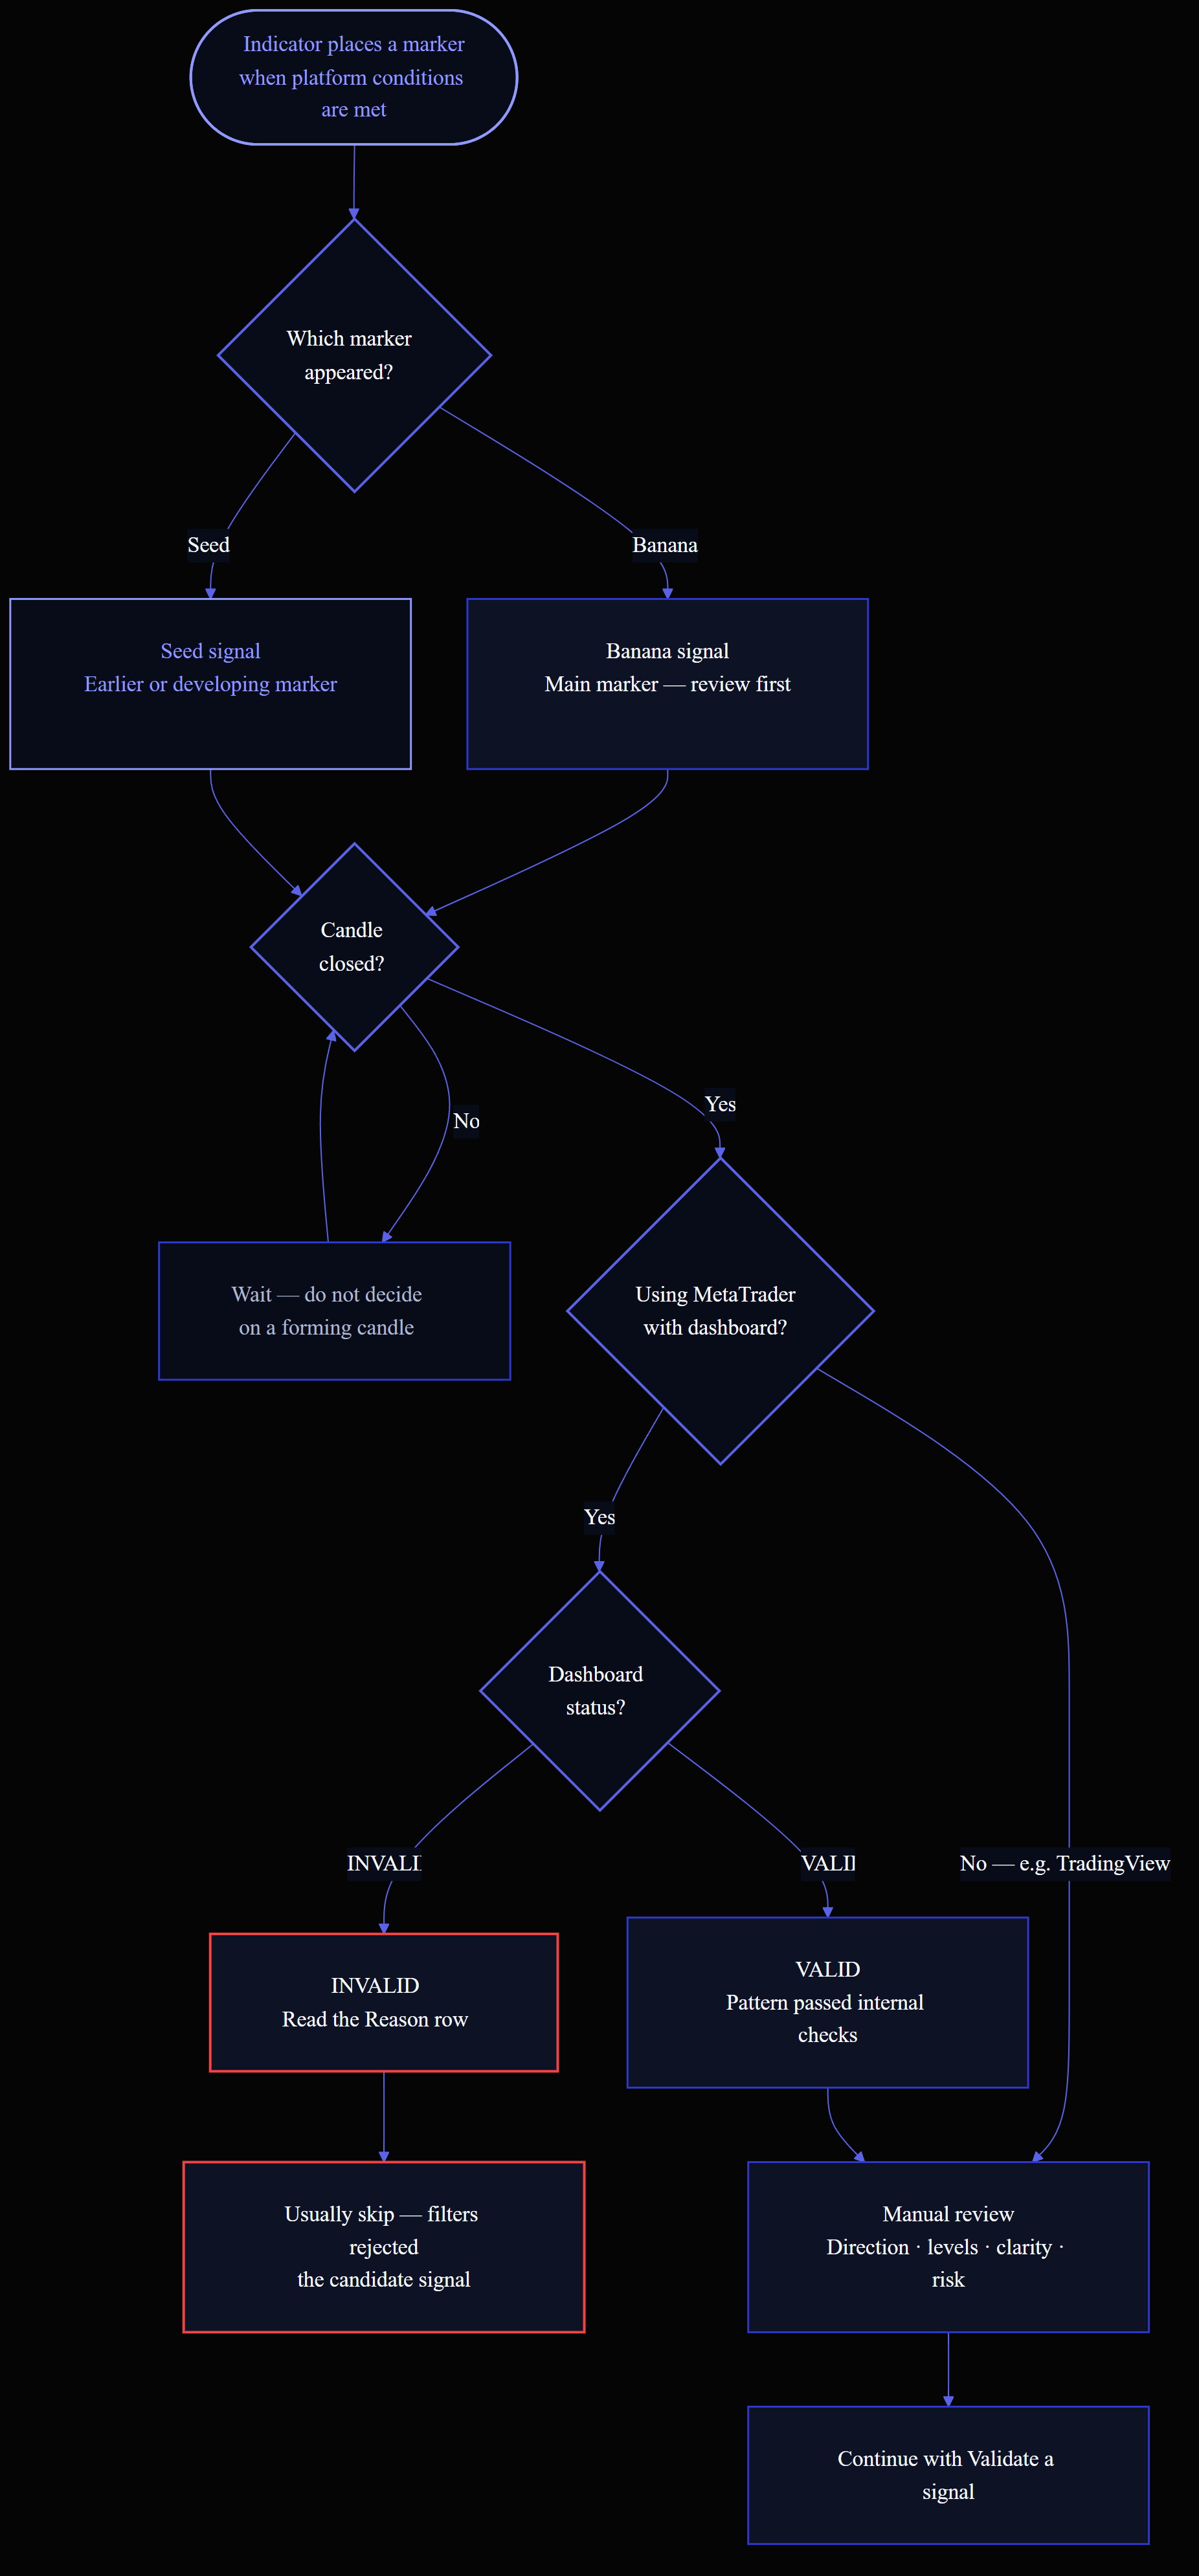
Reading A Signal
When a marker appears, check:
- Direction: buy or sell.
- Market movement: trending, pulling back, or ranging.
- Nearby levels: support, resistance, previous highs, previous lows.
- Chart clarity: clean movement or messy candles.
- Candle state: closed candle or still forming.
- Risk: where the stop would go and whether the trade is worth it.
For the practical review process, continue with Validate a signal. Strategy methodology: Banana strategy rules.
Signal Visibility
MetaTrader users can usually control which markers are visible:
- Show #1 Banana through Show #7 Banana for Banana signals.
- Show #1 Seed through Show #3 Seed for Seed signals.
- Platform display options for marker style and placement.
Begin with fewer visible markers if you are new to the indicator.
Common Misreads
Avoid these mistakes:
- Taking every signal automatically.
- Treating the signal number as a complete quality score.
- Ignoring support and resistance.
- Trading during conditions you normally avoid.
- Changing many settings at once.
- Assuming a signal means the trade has low risk.
Next Steps
- Validate a signal
- Core Settings
- Alerts
- Dashboard Panel
- TradingView charts — Chart examples