Quick Start On TradingView
Use this page after TradingView access for The Banana Indicator TV — Latest (v3, Pine v6) or Legacy. Start at Start on TradingView if you need the hub overview.
TradingView does not use a Windows installer or MetaTrader data folder. Access is granted to a TradingView username, then the invite-only script is added to a chart. This edition is not the same UI as MT4 or MT5 — different layout, filters, and dashboard. If you chart on MetaTrader, use the MT4 or MT5 guides instead.
The Banana Indicator marks setups to review. It does not place trades, size positions, or replace your trading plan. Not financial advice.
Video walkthrough
Add Banana on TradingView with defaults, then read markers, zones, and the dashboard before you change settings.
Before you start
Confirm:
- You are signed in to the TradingView username that iTradeAIMS granted access to.
- TradingView shows no invite-only access message for your edition.
- You have a chart open on the symbol and timeframe you intend to review.
- The indicator is on the same chart where you expect signals.
TradingView editions
Current Pine build (v3) — B#/S# labels, zones, dashboard.
Previous edition — keep only if your charts still use the Legacy script.
1. Add the indicator to your chart (In-Chart Method)
Once access is granted to your TradingView username, add the indicator directly inside your active chart layout:
- Open your chart on TradingView.
- In the top toolbar, click the Indicators button (the
fxicon, or press/on your keyboard). - In the left sidebar of the pop-up modal, select Invite-Only Scripts (with the lock icon 🔒).
- Click on Banana Super (or your granted edition: Banana Scalper, Banana Swing, or Banana Indicator Legacy).
- The indicator will immediately load onto your live chart with default settings!
Hover your mouse over the indicator name in the Invite-Only Scripts list and click the Star icon (⭐). This pins it directly to your top chart favorites bar for instant 1-click toggling!
2. Leave defaults for the first session
For your first look, do not change settings yet. The v3 defaults are tuned for a clean chart:
| Area | Default | What it means |
|---|---|---|
| 1 · Signals | AIMS Banana Pattern | Stricter multi-bar pullback logic (recommended). |
| B#/S# labels on, arrows off | Glow + numbered labels; diamonds optional. | |
| 2 · Filters | EMA + RSI + SuperTrend on | Fewer counter-trend and extreme-RSI markers. |
| Price vs Slowest MA | Buys only above the slowest MA; sells only below. | |
| 5 · Trade levels | Zones on | Shaded risk/reward boxes on each setup. |
| 6 · Display | Current setup only | One live setup per direction on chart. |
| 7 · Trend colouring | Smart Trail + gradient candles | Trend glow and candle strength colouring. |
| 9 · Dashboard | On, top right, dark theme | Live readout panel (see below). |
| 4 · Session | Off | No time window filter until you enable it. |
Open Settings (gear on the indicator) only if you need to move the dashboard or reduce visual density. Full group-by-group reference: TradingView settings.
3. Read your first chart
After the script loads, you should see:
Signal markers
- Buy setups: glow + B# label below the bar (optional diamond if you turn Show arrows on).
- Sell setups: glow + S# label above the bar.
- Markers appear on confirmed bar close (non-repainting).
See Signal detection for what the labels mean. Chart walkthroughs (buy, sell, wins, losses) live on Chart examples.
Trade level zones
On a fresh signal, the script draws a full setup:
| Level | Typical style |
|---|---|
| Entry | Grey line / zone edge |
| Stop | Red dashed |
| TP1 / TP2 | Green |
| Invalidation | Amber dotted |
Default Level style is Zones (filled risk/reward boxes). Switch to Lines or Both under 6 · Display if you prefer.
Exit marks
When a triggered setup hits TP1, its stop/invalidation, or both targets, an x can print on the chart (Exit marks — on by default). Examples: B2 Banana buy signal and S2 — stop hit on the chart examples page.
Dashboard panel
The Banana dashboard (top right by default) shows indicator-only fields:
- Symbol and timeframe
- Trend pill (bull/bear)
- RSI value and state
- Session active/closed (when session filter is enabled)
- Active LONG or SHORT setup with Entry, Stop, TP1, Invalidation, and Risk:Reward
- Active filters (EMA, RSI, ST, …)
It does not show P/L, win rate, drawdown, or lot size — those belong to the separate AIMS Algo strategy, not this indicator. See Dashboard panel.
4. Confirm it is working
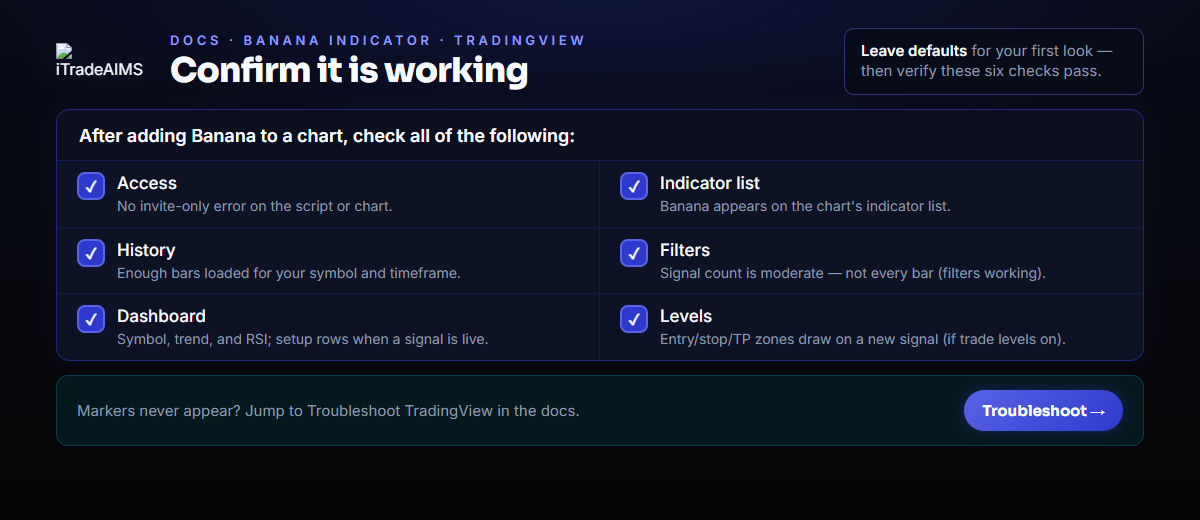
Check all of the following:
| Check | Pass when |
|---|---|
| Access | No invite-only error on the script or chart. |
| Indicator list | Banana appears on the chart's indicator list. |
| History | Enough bars loaded for your symbol/timeframe. |
| Filters | With defaults on, signal count is moderate — not every bar (filters are working). |
| Dashboard | Panel shows symbol, trend, and RSI; setup rows populate when a signal is live. |
| Levels | A new signal draws entry/stop/TP zones (if Show trade levels is on). |
If markers never appear, see Troubleshoot TradingView.
5. Optional first tweaks
After one session on defaults, common adjustments:
- Too many signals — keep EMA filter and RSI filter on; enable Session window under 4 · Trading Session.
- Too few signals — review whether price is on the wrong side of the Slowest MA for the direction you expect.
- Cleaner chart — turn off Gradient candles or Smart Trail under 7 · Trend Colouring.
- Signal logic — switch Signal logic to AIMS Algo Logic only after you understand the difference (Algo-style vs Banana Pattern pullbacks).
- Colours — use TradingView's Style tab on the indicator (not a separate Colours input group).
Next steps
- TradingView settings — scroll the Inputs tab (groups 1–10) with screenshots.
- Chart examples — buy/sell walkthroughs with zones, trail, TPs, and stops (XAUUSD charts).
- Create TradingView alerts — conditions Banana Buy and Banana Sell in the alert menu.
- Troubleshoot TradingView — access, missing markers, alerts.
- Shared concepts — Signal detection and How to use The Banana Indicator.